


The United States Department of State provides clear—and quite strict—regulations regarding passport photos. American citizens must prepare an image that meets all the requirements; however, visiting a photo studio is not always possible. Fortunately, some programs enable people to edit their photographs in the comfort of their own home.
No matter if you are just a beginner or a more experienced GIMP user, this post will cover the instructions in both detailed and more general terms. Moreover, we will consider 2 (two) situations: when users already have their passport photo taken and just want to crop it, or they need to alter not only the dimensions but also the background. Keep reading and prepare to create your US passport photos in GIMP!
Get a 100% compliant passport photo with Passport Photo Online.
- Upload a selfie.
- Our AI crops, resizes, cleans the background, and adjusts the lighting.
- One of our human experts (available 24/7) reviews your photo within minutes.
- Download a high-res JPEG instantly or order prints with 2–3 business day delivery.


Get a digital passport photo – or order prints with Passport Photo Online.**
Unlimited Retakes
Competitive Pricing
GDPR & CCPA Compliant
Used by 1M+ Users Annually
I used Passport Photo Online and got a verified, compliant digital passport photo from a simple selfie. The whole process took about five minutes. The prints arrived just a few days later. I saved time and money and my passport application was accepted!
US passport size photo in GIMP: preparations
To prepare their passport photographs in GIMP, US citizens need to be aware of the requirements, including size, proportions, and the general presentation of the picture. Also, users must have digital photos to start editing them in the program. Check our article on creating passport photos at home.
You probably already had your photo taken at some point; now, the only thing to do is change its size and fit it into the official requirements. In the following sections, we will show US beginners and more technology-oriented citizens how they can use Gimp to crop their passport pictures.
Crop your photo for a passport with GIMP
To use GIMP for cropping a passport photo, the very first thing users need to remember is to have a digital image on their computer. Scanned photographs are generally not accepted by the US State Department.
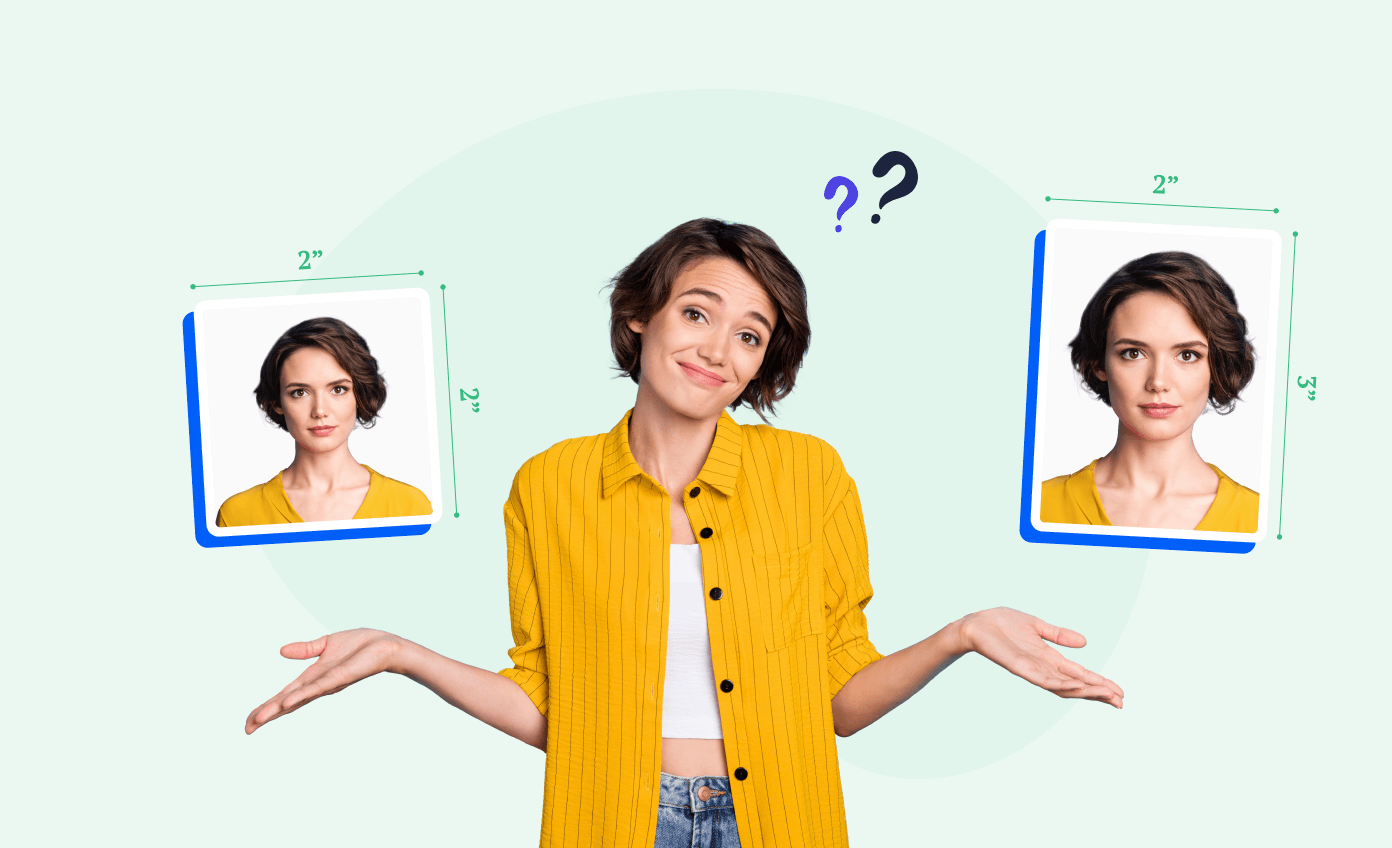
You came to the right place if you have managed to create a passport photo with a white or off-white background. Keep reading to get detailed and brief instructions on cropping your picture in GIMP to the desired 2 x 2 size photo.
2 by 2 passport photo in GIMP for beginners
At the very beginning, users need to, of course, start the program. What’s next?
Step #1: Open the photo in GIMP
In the upper left corner, click File, and choose the Open option. Then, find your image in the computer’s memory and open it in the program. You can also use the Control+O shortcut if you are more comfortable with the keyboard than with manual searching.
Step #2: Scale the image
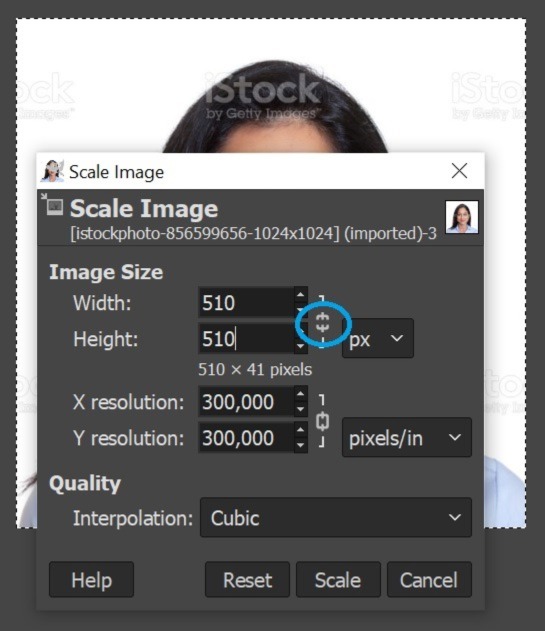
Users’ pictures might have different dimensions from the desired ones. To make the cropping more comfortable, you should change the image’s width to 510. How to do this? Click on the upper Image panel, then choose Scale Image. You will see a box with measurements. Type “510” next to the width and click “Scale.”
Step #3: Preparing the Rectangle Select tool
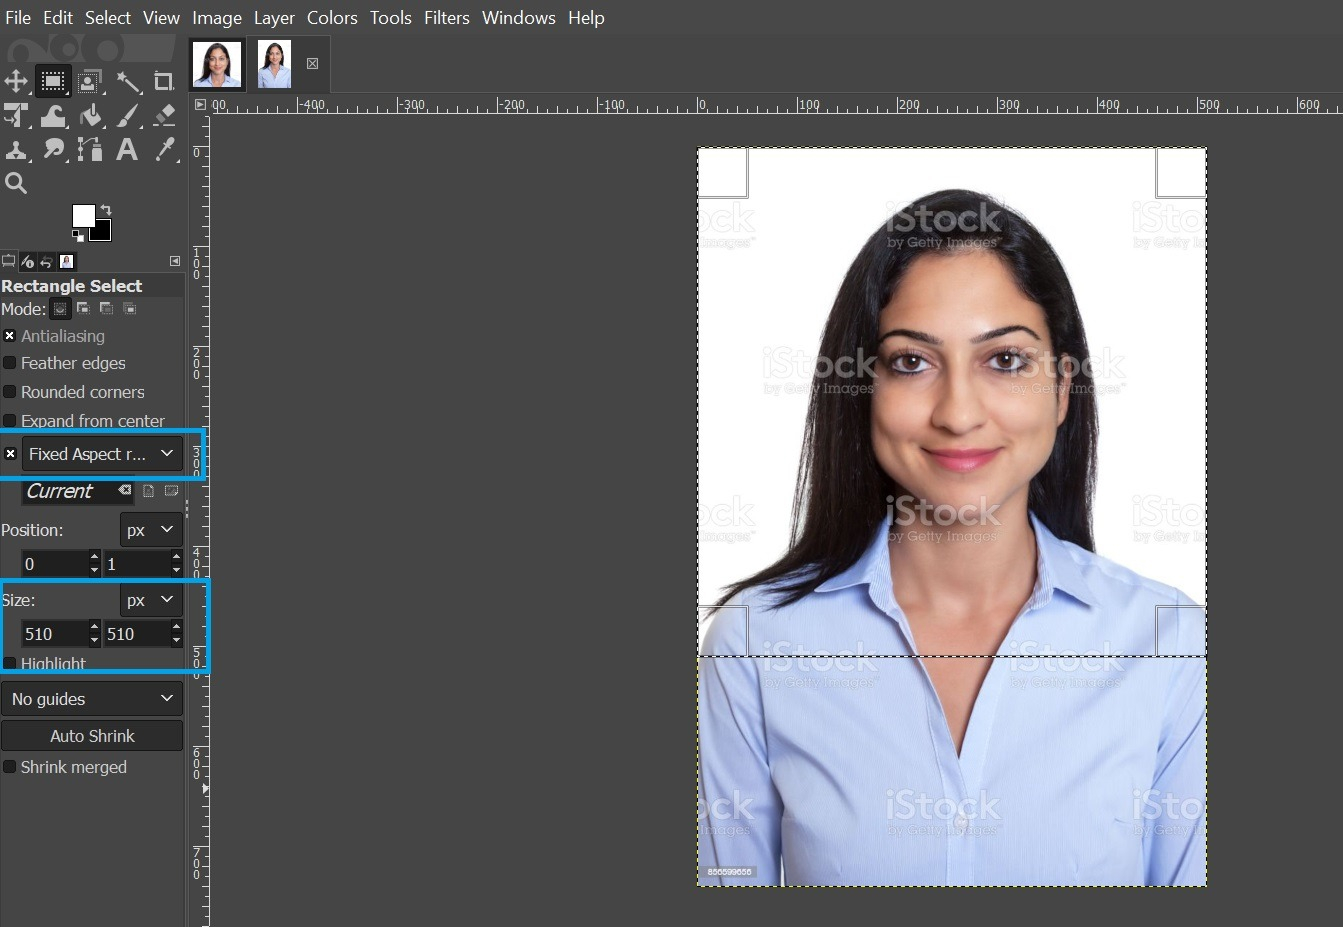
Users must create a proper tool to crop the photo to the required passport size. Make your searching easier with a simple slash ( / ); you will see a search box after clicking it. Type “rectangle select” and double-click on it. Now, draw a small rectangle in any part of the image—we must adjust a new size first. On the left-side panel, change the Size option (remember to keep it in px). What we are opting for is 510 x 510 px. Now check the Fixed Aspect Ratio a little above and hit Enter.
Step #4: Cropping your image
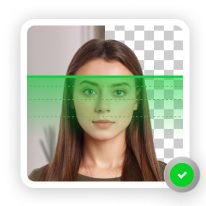
Take your prepared rectangle box and drag it over the image. Remember about the passport photo proportions—the head should take up around 70% of the whole picture. After selecting the space, go to the upper panel, choose Image, and then Crop to Selection.
Step #5: Make sure your image has the correct dimensions
This step might not be necessary—skip it if your image has been properly cropped.
It can happen that after cropping a few pixels get lost along the way. You can quickly check the cropped image size—it’s displayed at the very top of the program. If the picture is not 510 x 510 px, you need to scale it again, just like in Step #2. This time, however, one other thing needs to be done. Go to the Image panel and choose Scale Image. Again, you will see a box with measurements. Before changing the dimensions, you must click on the chain (a short line that connects width and height) and break it. This way, you can change just one dimension without disturbing the other one. Change the one you need to 510 and click Scale.
Step #6: Save your passport photo
GIMP has its own file extension; to download the image in a JPG format, users need to do the following:
- Open the File menu and go for Export As;
- Name your picture and change the extension to JPG;
- Click Export twice;
- Your image has been successfully saved!
DIY 2×2 passport photo with GIMP: brief guidelines
US citizens who have some previous experience with GIMP can make use of the following instructions:
- Open your image in the program.
- Scale the picture to 510 px in width.
- Choose the Rectangle Select tool and, keeping the ratio, change its size to 510 x 510 px.
- Select the correct part of the image according to the passport photo proportions.
- Crop the image and scale it again if necessary.
- Save the prepared passport picture as a JPEG.
Create your own passport photo using GIMP
We are well aware that it is not always possible to take a photo against a white background. That is why we would like to provide US citizens with more complex guidelines on altering their images. Thanks to these, users can crop their pictures, change dimensions and adjust the background. Again, before starting GIMP, users must make sure they have their digital passport photo on their computer.
US passport photo in GIMP: detailed step-by-step instructions
Having cropped and scaled your image to the required passport photo size, it is time to alter the background. The US official requirement states that applicants should take their passport pictures in a white or off-white setting. How to do that in GIMP?
Step #1: Prepare the tool
Go to the search box (“slash” key), type “foreground select,” and double click on the first result. You will see a little lasso next to the mouse pointer.
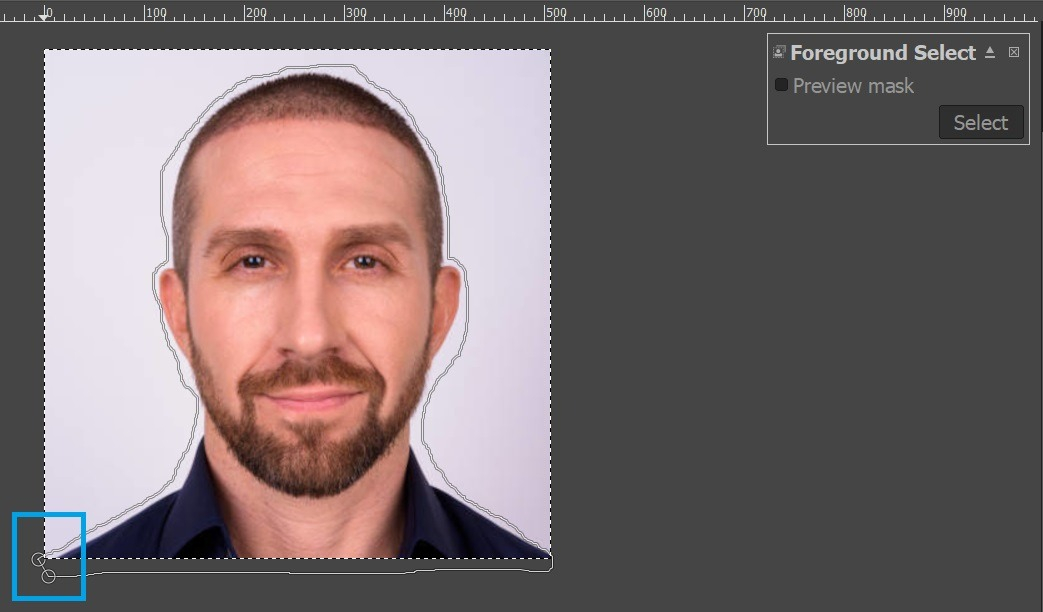
Step #2: Draw on your picture
Using the function selected before, draw a line around the person in the image. You must do it manually with your mouse; the line can go outside the image’s frame. However, try to draw as precisely as possible to avoid further corrections. Now, as you get closer to the beginning of the line, let go of the mouse. You will see two circles at the line’s start and end. Click on the first circle—this way you will connect the drawing. Hit Enter to accept.
Step #3: Paint the picture
To show the program what it should work on, users must now paint the person in the image. After connecting the line, the brush function will appear automatically. Cover the person as accurately as you can. Having done that, hit Enter twice. Go to the Select panel and choose Invert. This will make us ready for the next step.
Step #4: Create a new layer
Go to the search box, type “layer,” and double-click on the first result. You can name your layer as you wish but do not change any dimensions or functions—the layer should be transparent (the last option, Fill with: Transparency).
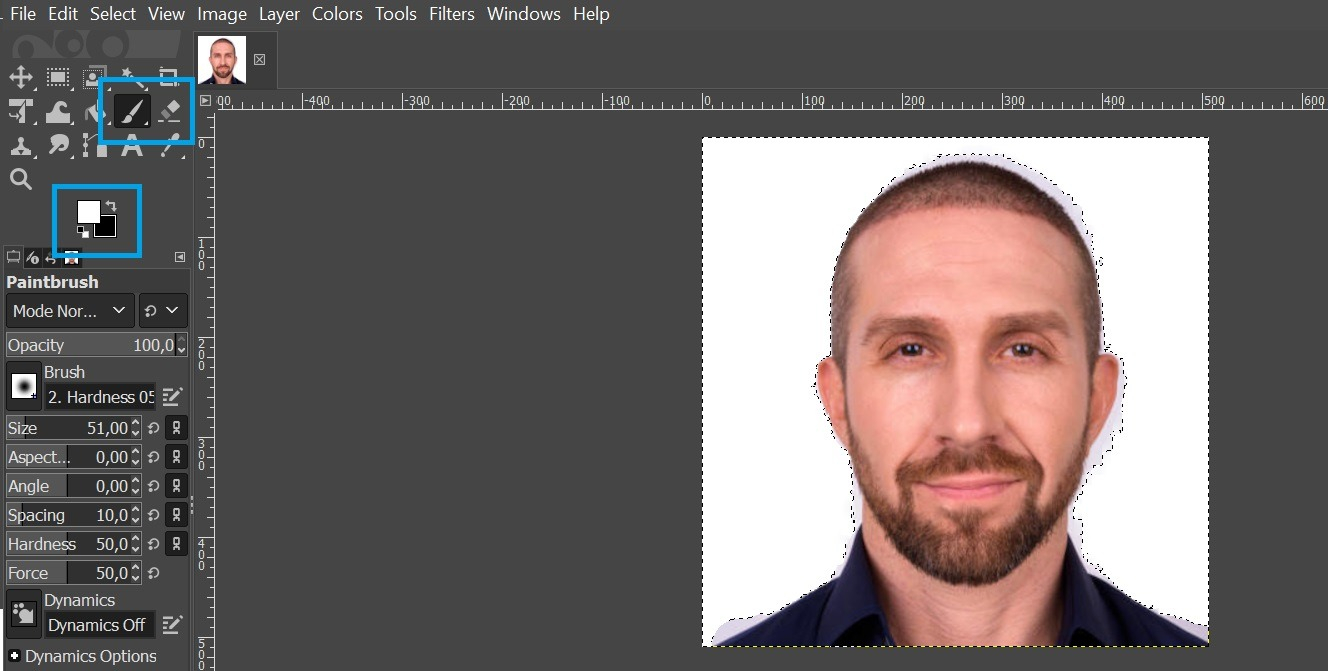
Step #5: Change the background
Users will see two squares on the left-side panel—black and white. Take the white one and drag it to your image background. If you notice any inconsistencies or imperfections, you will need to correct them manually. First, click the Eraser Tool from the left-side panel and fix anything that disrupts the person’s appearance. Since the GIMP background removal is not 100% accurate, take the brush (Paintbrush Tool), choose white as the active color, and paint in the left-out places.
Step #6: Save your passport image
Having cropped and altered the background, your passport photo is ready to be saved. Remember to choose the Export function and change your image extension to JPG.
Steps to prepare a passport photo in Gimp—boiled down
First, check our brief guidelines for cropping your image in GIMP. Then, proceed with the following steps:
- Choose the Foreground Select feature.
- Draw the line around the person in the image and paint in the selected area.
- Create a new layer.
- Change the background color to white and correct any imperfections.
- Save your passport image in JPG.
Should you create a US passport photo with GIMP?
There are a lot of options in GIMP that users can implement in their photo-editing journey. However, there are also drawbacks to this solution. First and foremost, it can be time-consuming for beginners to grasp the GIMP functions. The work is quite tedious, especially with the background removal, and photo quality is not guaranteed. Moreover, users must rely on their own judgment—there is nobody to review their photos before the passport application. There is another option that US citizens could make use of—the Passport Photo Online application.
An alternative: Passport Photo Online
Passport Photo Online is a free tool that transforms any picture into an official photo of the user’s choice. Its impressive database enables individuals to create photographs for IDs, passports, visas, and many other documents. US citizens wishing to get their passport photos quickly and comfortably will benefit most from this application.
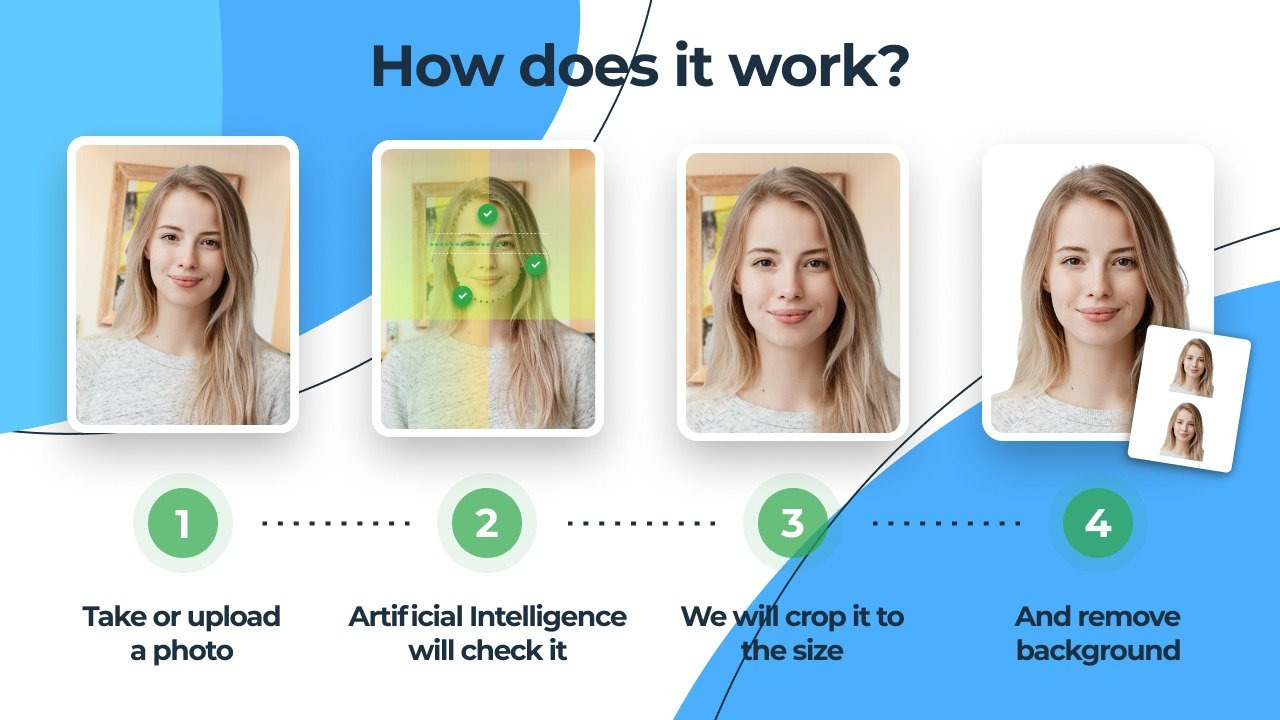
The rules are simple: download the app on your mobile phone, take a picture—or upload the one you already have—and wait for the results! There is nothing users must do manually. Thanks to the advanced AI system, the Passport Photo Online app crops, resizes, and alters the background automatically, meeting all the requirements for the US passport photo.
The app works perfectly for everyone. Get passport photographs of your family members or friends at home, and order the most suitable delivery option—we offer digital and printed versions of your passport pictures.
With the expert team working around the clock, we guarantee 100% compliance with the official US requirements. If there is anything wrong with your image, we ensure to make it up to you with a 200% refund of the original price. Try Passport Photo Online and receive your reviewed passport pictures comfortably at home!
FAQ
Having gone through the instructions, let us wrap it up with some of the most frequently asked questions.
How do I create a 2×2 picture in GIMP?
How do I create a passport-size photo in GIMP?
How do I print a 2×2 photo in GIMP?
How to edit passport photos in GIMP?
Closing thoughts
As a free graphics editor, GIMP offers its users plenty of possibilities to create a 2 x 2 passport photo. The pictures can be resized and cropped to desired dimensions, and the background color can be changed. However, it may take beginners some time to grasp the program’s functionality. There is also no guarantee that the image won’t get rejected by the US State Department.
If you want to ensure that your passport photo is 100% acceptable, try Passport Photo Online. In just 3 (three) seconds, US citizens can take pictures and have them reviewed by experts. Download the app today and start designing your own passport photo!
Sources

Roxana is a writer with 3+ years of experience. As a Master in psycholinguistics, she blends her passion for language and communication with insights from diverse cultures, making her content resonate with a broad audience.