


Most of the time, resizing or cropping images is super easy and intuitive. The problems begin when you need to crop them to a specific size.
And this is exactly what you need to pay attention to when you resize an image to passport size—
If you don’t stick to official US regulations and submit an incorrectly sized photo, your entire passport application will get rejected.
Not to worry, though. Here’s how to make a passport-size photo at home.
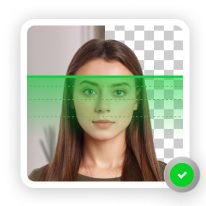
Get a 100% compliant passport photo with Passport Photo Online.
- Upload a selfie.
- Our AI crops, resizes, cleans the background, and adjusts the lighting.
- One of our human experts (available 24/7) reviews your photo within minutes.
- Download a high-res JPEG instantly or order prints with 2–3 business day delivery.


Get a digital passport photo – or order prints with Passport Photo Online.**
Unlimited Retakes
Competitive Pricing
GDPR & CCPA Compliant
Used by 1M+ Users Annually
I used Passport Photo Online and got a verified, compliant digital passport photo from a simple selfie. The whole process took about five minutes. The prints arrived just a few days later. I saved time and money and my passport application was accepted!
Looking for more information on resizing passport photos? Read these articles on our blog:
Find out how to crop a photo to the correct size
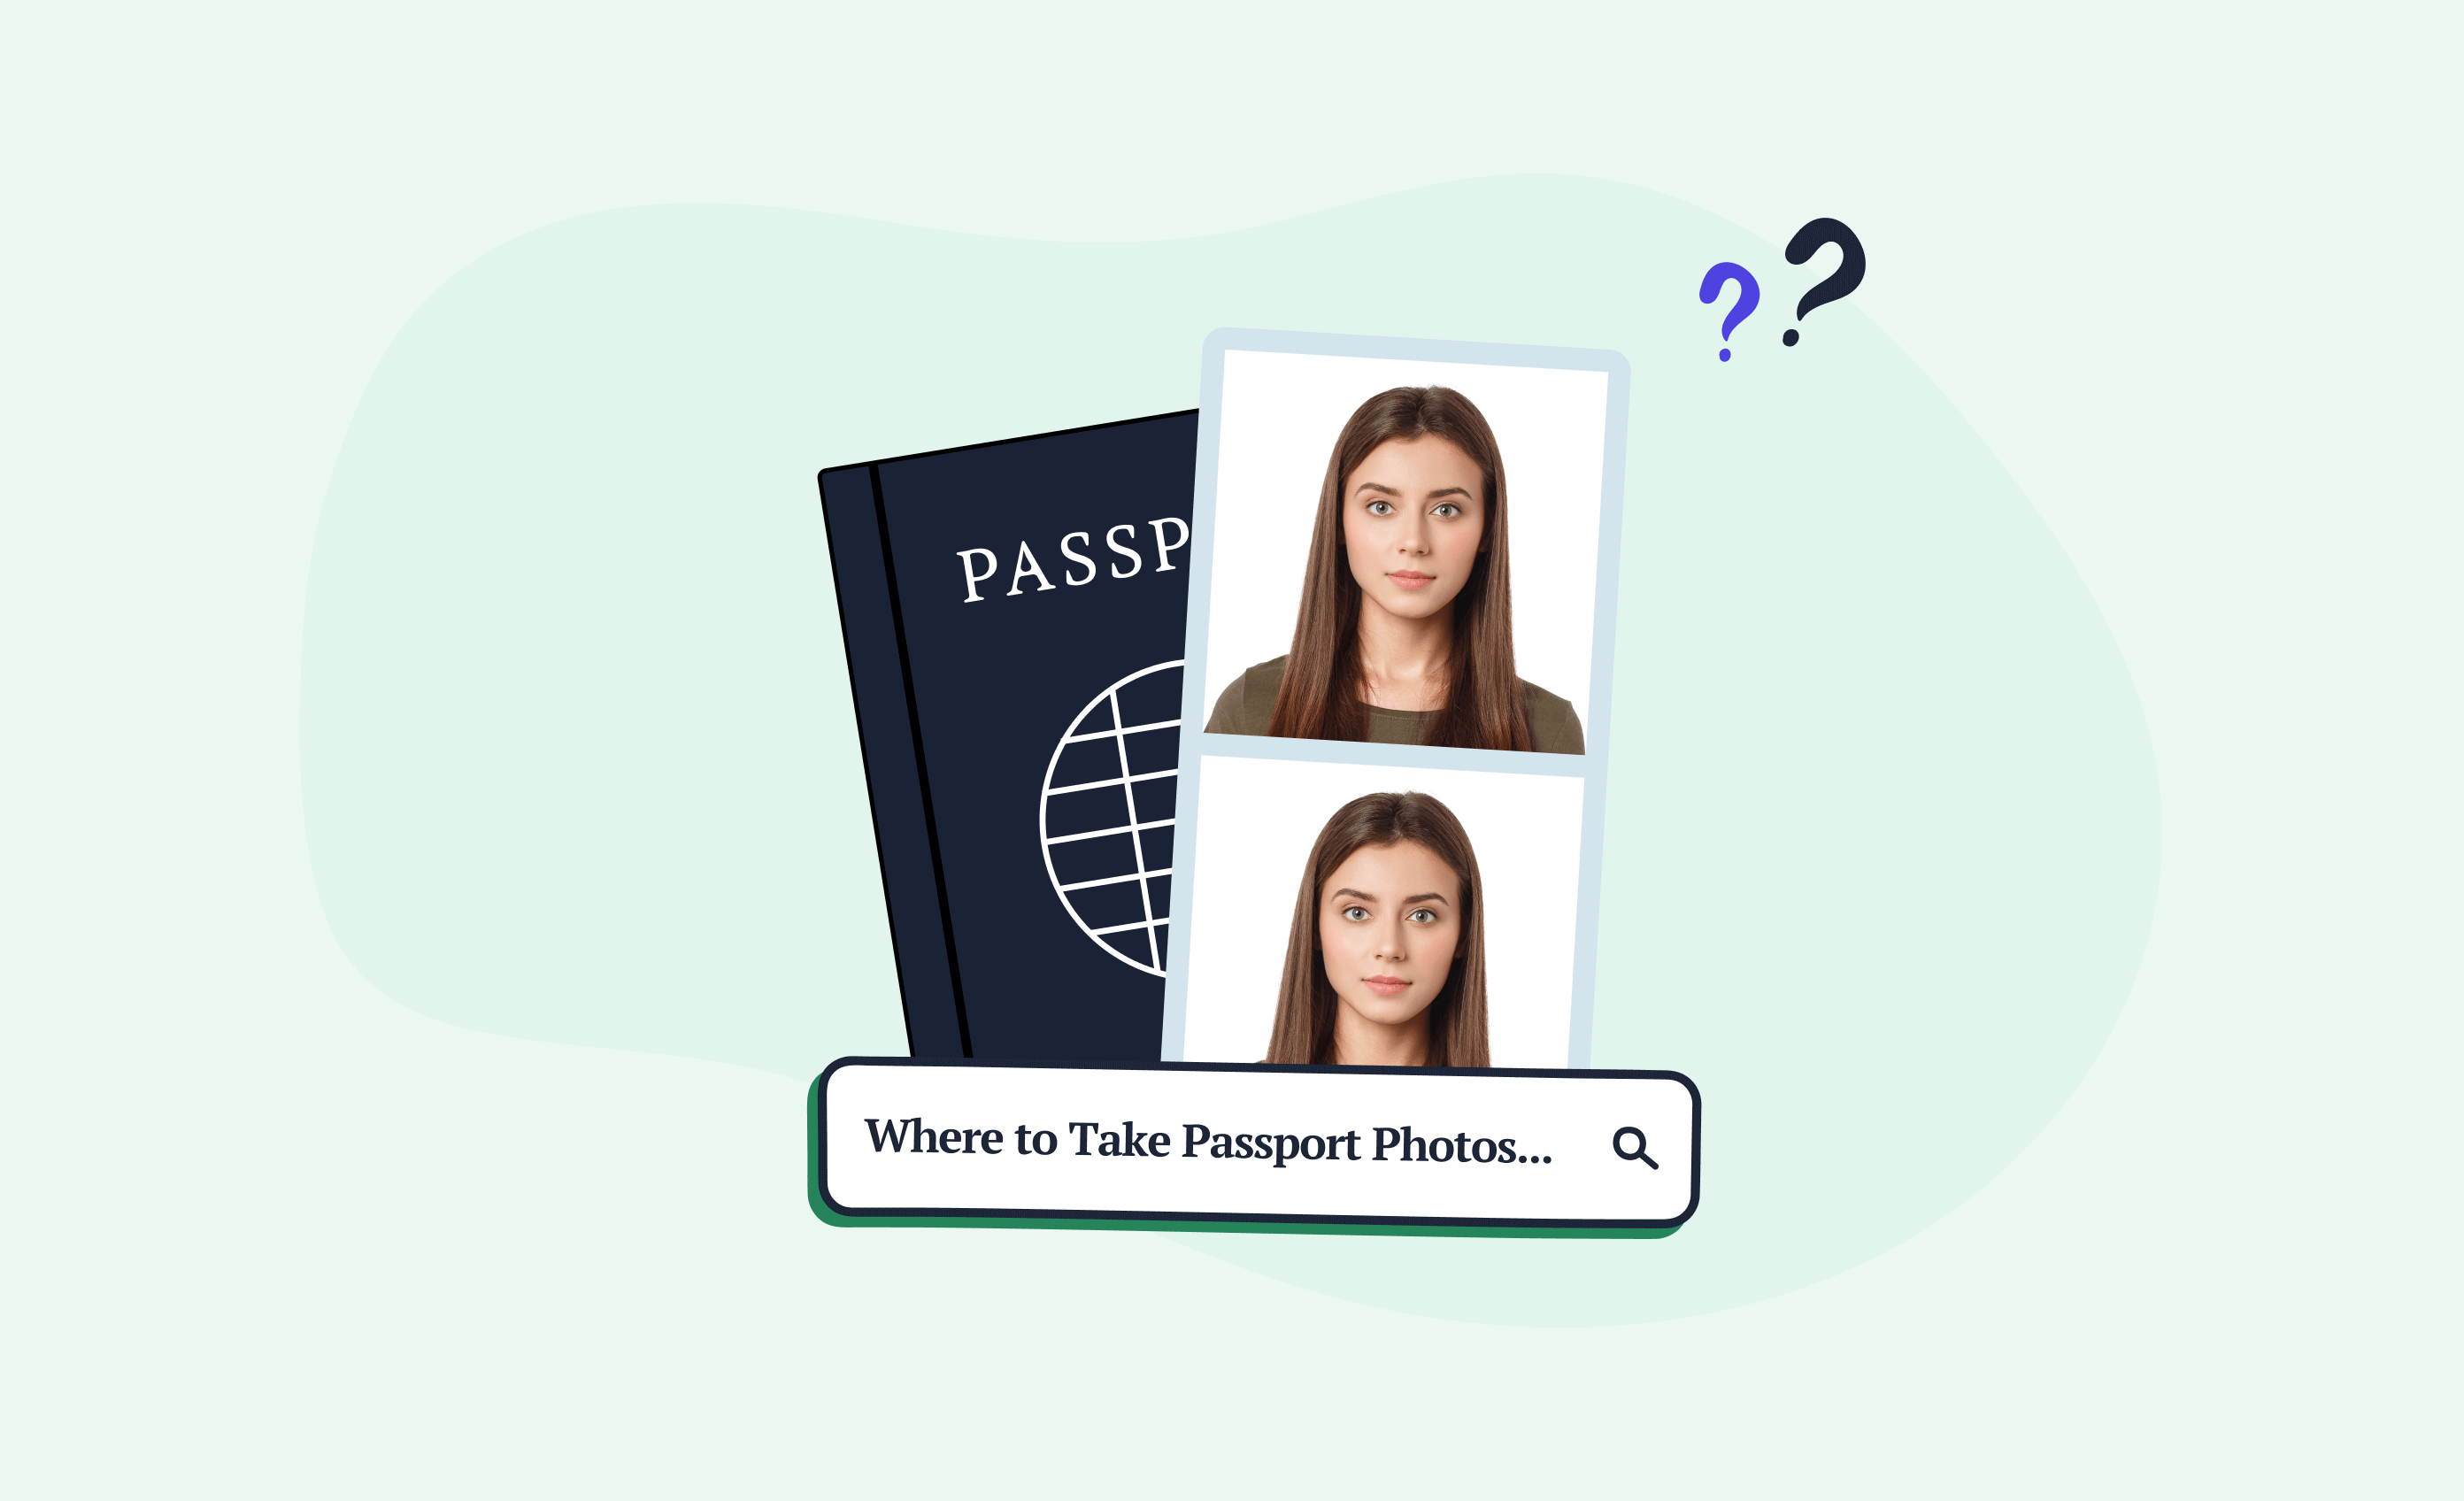
Before resizing an image to passport photo size, get to know what the right size actually is.
Ever since it became possible to renew a passport online, the Department of State’s Bureau of Consular Affairs has publicized size requirements for digital (and printed) passport photos.
Here’s all you need to know before attempting to resize your passport photo:
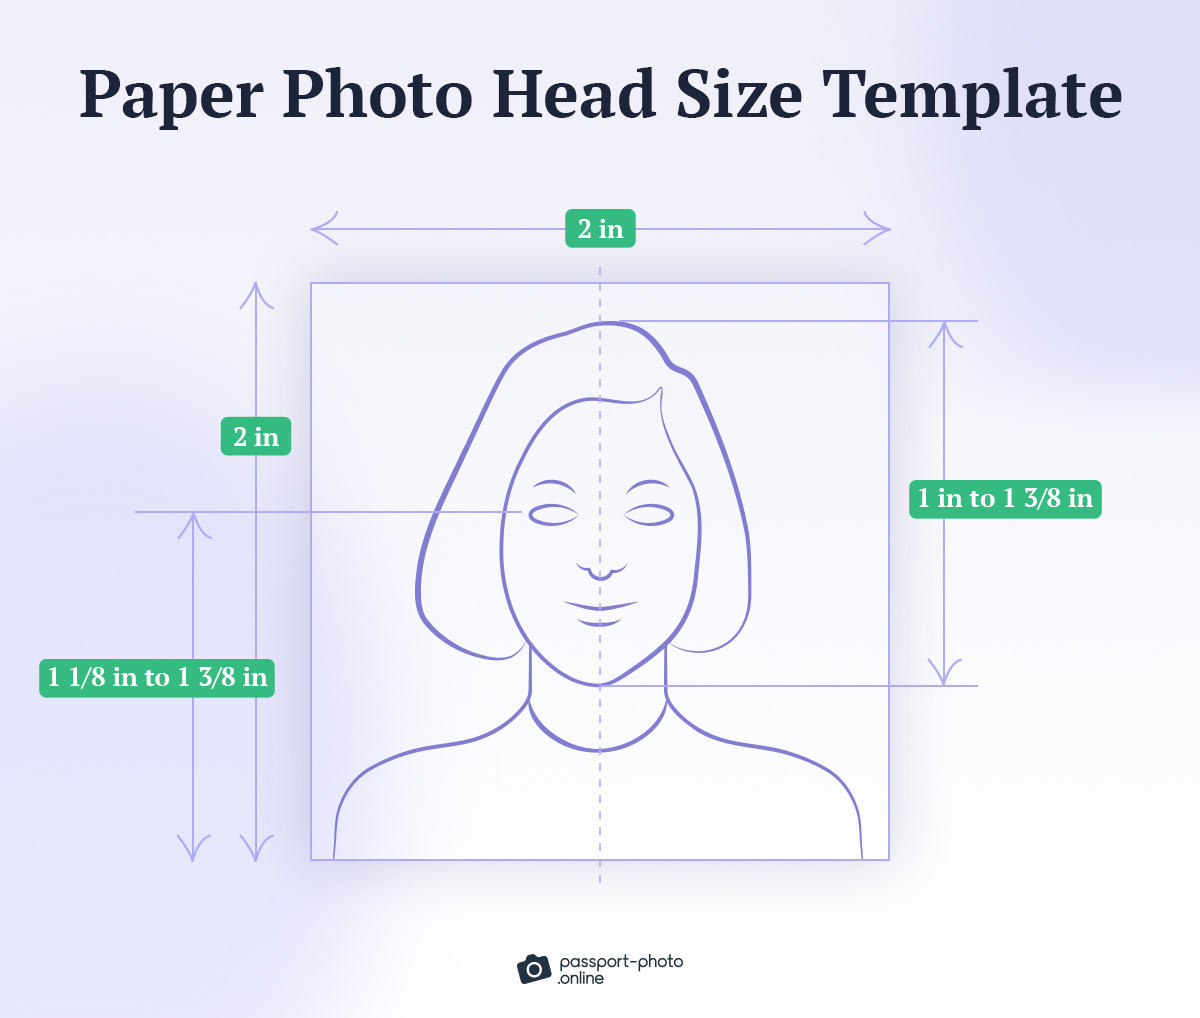
| Printed | • Passport-size photo ratio: Square • Size: 2×2 inches (51×51 mm) • Head size: 1–1⅜ inch in height • Photo paper: Matte or glossy photo-quality paper |
| Digital | • Resolution: ≥600 pixels per inch (ppi) • Format: JPEG • File size: ≤ 240 KB • Head size: 50–69% in height |
For further details, take a look at the official US photo composition template for both paper and digital photos.
Remember that the table and image above show information on US 2×2 passport photos. Here’s a quick overview of popular passport photo sizes in different countries:
You can learn about photo sizes for different passports, IDs, or visa photos by checking out our complete list of biometric photo requirements.
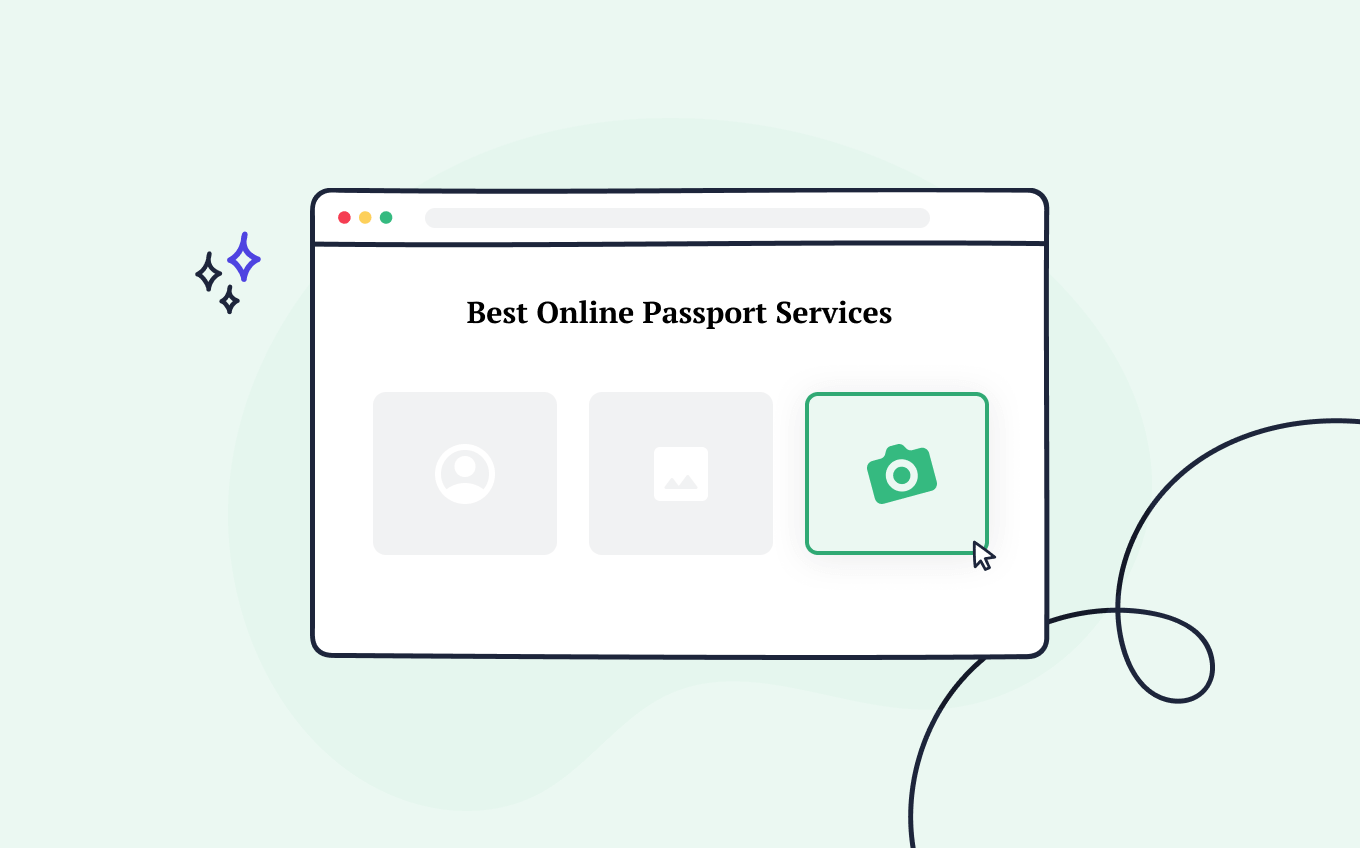
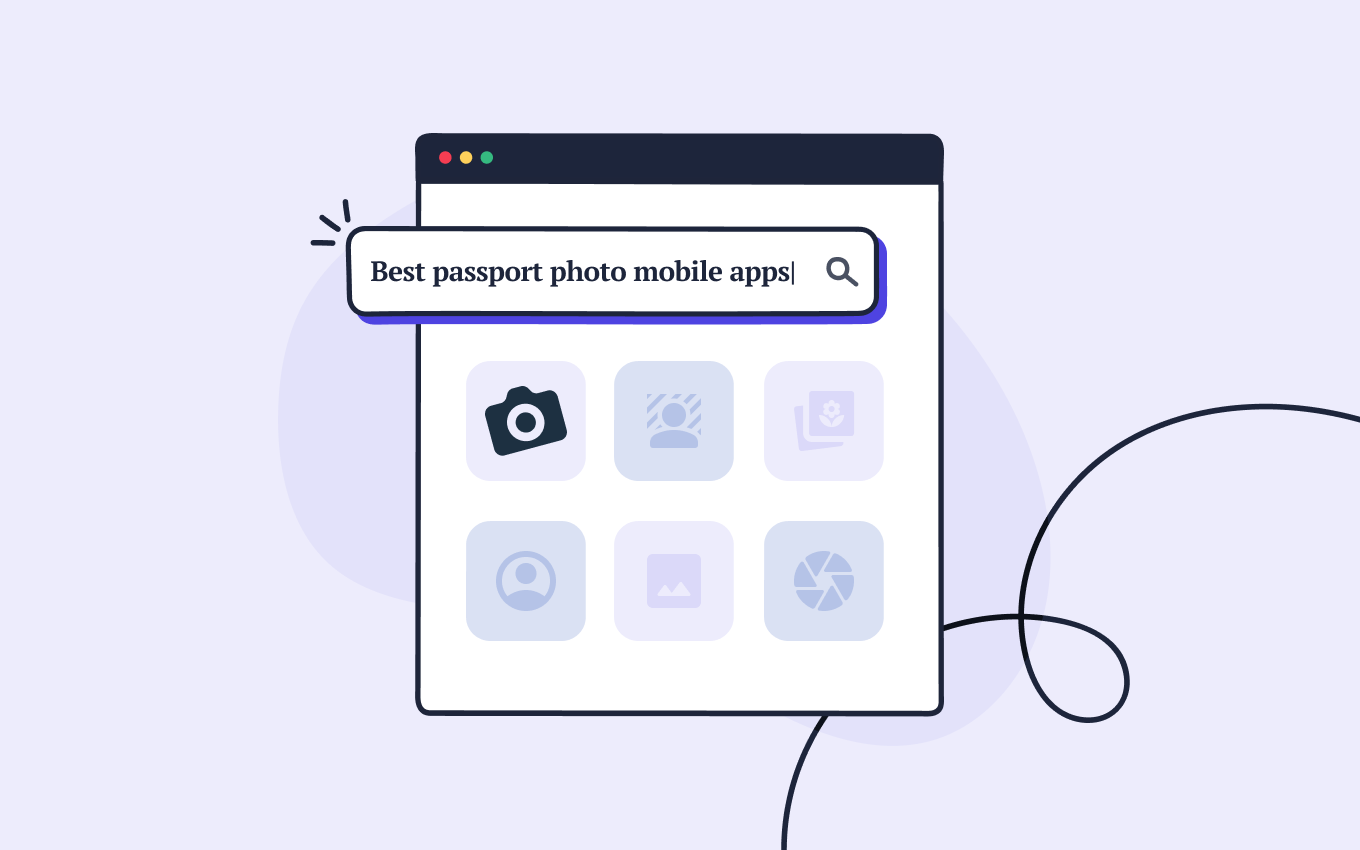
Resize a photo to passport size with a dedicated app
The fastest and safest way to get your passport photo resized appropriately is by using a dedicated passport-size photo maker.
Many passport photo tools offer built-in resizers that will get the job done in a snap. They’ll also tweak your images so they stick to the official regulations.
Yet, not all free passport photo tools offer all of their functionalities for free, so it’s advisable to check the reviews before using a specific service.
To choose the best passport photo resizer, consider one that includes:
- Automatic resizing and editing—to save you time and effort
- Expert verification and a compliance guarantee—to be sure the cropped passport image is fully compliant with all regulations
For example, this is how to convert a photo to passport size with our app:
- Upload a photo from your gallery or take a picture with your phone’s camera.
- Choose the size or document you want to resize the photo to.
- Wait for the AI system to check the image’s validity.
- Get the picture automatically resized.
- Additionally, the app will remove or adjust the background (if necessary).
You will get the ready-to-download digital file in JPEG format. You can also get the printed version delivered to your home address.
Alternatively, you can get your image resized to passport photo size directly in your browser.

And here’s a detailed and user-friendly review of our top 10 picks of 2×2 passport photo apps to help you better assess which online tool to try.
But if you want to crop a photo to passport size manually, stay tuned.
Crop a photo to passport size using photo editing tools
Below, we cover how to get a passport photo resized and cropped using popular image editing tools.
To change your photo’s dimensions to passport size, you need to:
- Have some experience with image editing software
- Follow the steps below closely and accurately
Also, you need to consider the risk of your photo getting rejected, as the requirements are very strict.
How to convert a photo to passport size with Photoshop
Here’s a list of steps:
1. Open Adobe Photoshop and select “File” from the top menu.
2. Click on “Open” and find the location of the passport image you want to resize.
3. Select the “Crop” tool from the left-hand side toolbar.
4. Set the toolbar at the top of the screen in the following way:
- “Width” and “Height” values are set to 2 inches by 2 inches (51mm x 51mm)
- “Px/in” is 600
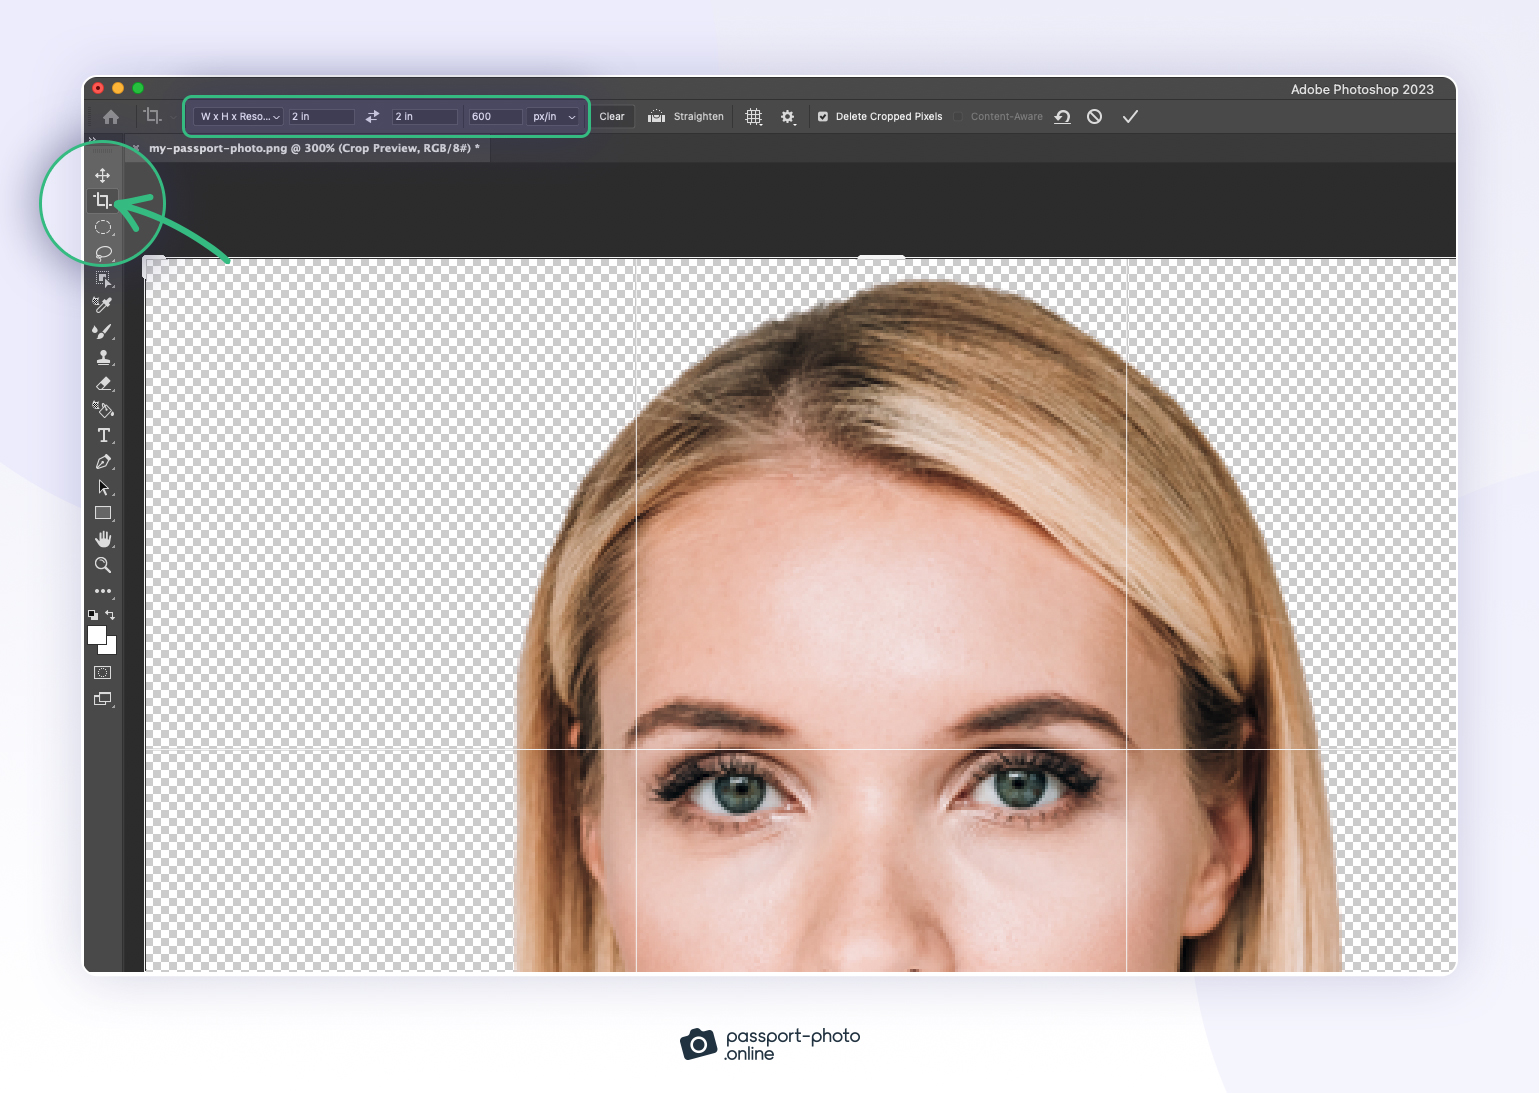
5. Now click and drag the crop tool over the area of the image that you want to keep. Once you select the desired area, hit the “Enter” key on your keyboard to apply the crop.
6. Go to “Image” on the top menu and select “Image Size” to open the dialog box and make sure that the “Resample Image” option is selected. Click “OK” to apply the changes.

7. Save your newly resized image by selecting “File” from the top menu and pressing “Save As.”
8. Choose a location on your computer to save the file and select “JPEG” as the file format.
Find out more about Photoshop and passport photos here.
Pro tip: If you don’t have Photoshop, you can use a free web app called Photopea instead.
Crop a photo for a passport with Lightroom
Let’s check how to convert a photo into passport size with Lightroom now:
1. First, open the desired picture in Lightroom. What you want to do now is set up the proper photo configuration.
2. Click on the “File” tab, then go to “Export.” A tab will open. Scroll down to the “Image Sizing” section.
3. The picture needs to be square, so choose the “Width & Height” option before introducing the right dimensions. Type in 2,000 in both “W” and “H” cells (width and height). A resolution of 600 pixels per inch will do the job.
4. Then, scroll up to “File Settings” in the same tab to ensure the image is in:
- JPEG format
- sRGB color space
And set the quality slider value to 100.
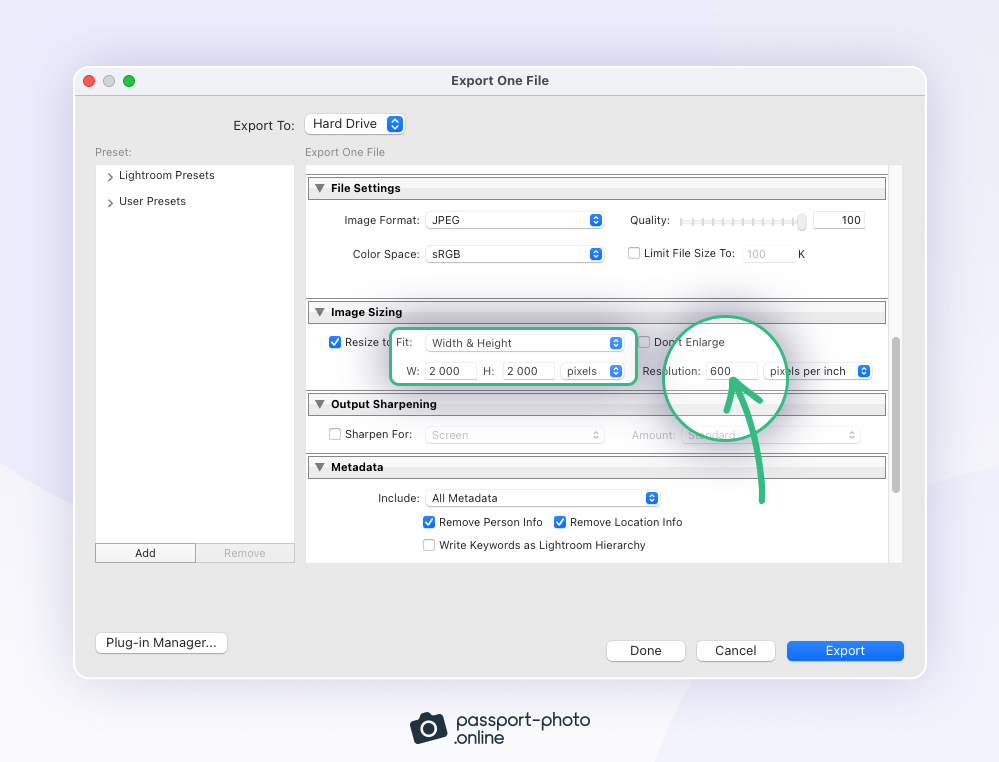
5. Make sure everything looks like this and export the image to the desktop.
Resizing a photo to passport size with Paint
Here’s a list of instructions and support images:
1. Open Microsoft Paint, go to the “File” tab, and upload the picture you want to convert to passport size.
2. To adjust height and width, click on “Select,” choose the “Rectangle” option, and crop it.
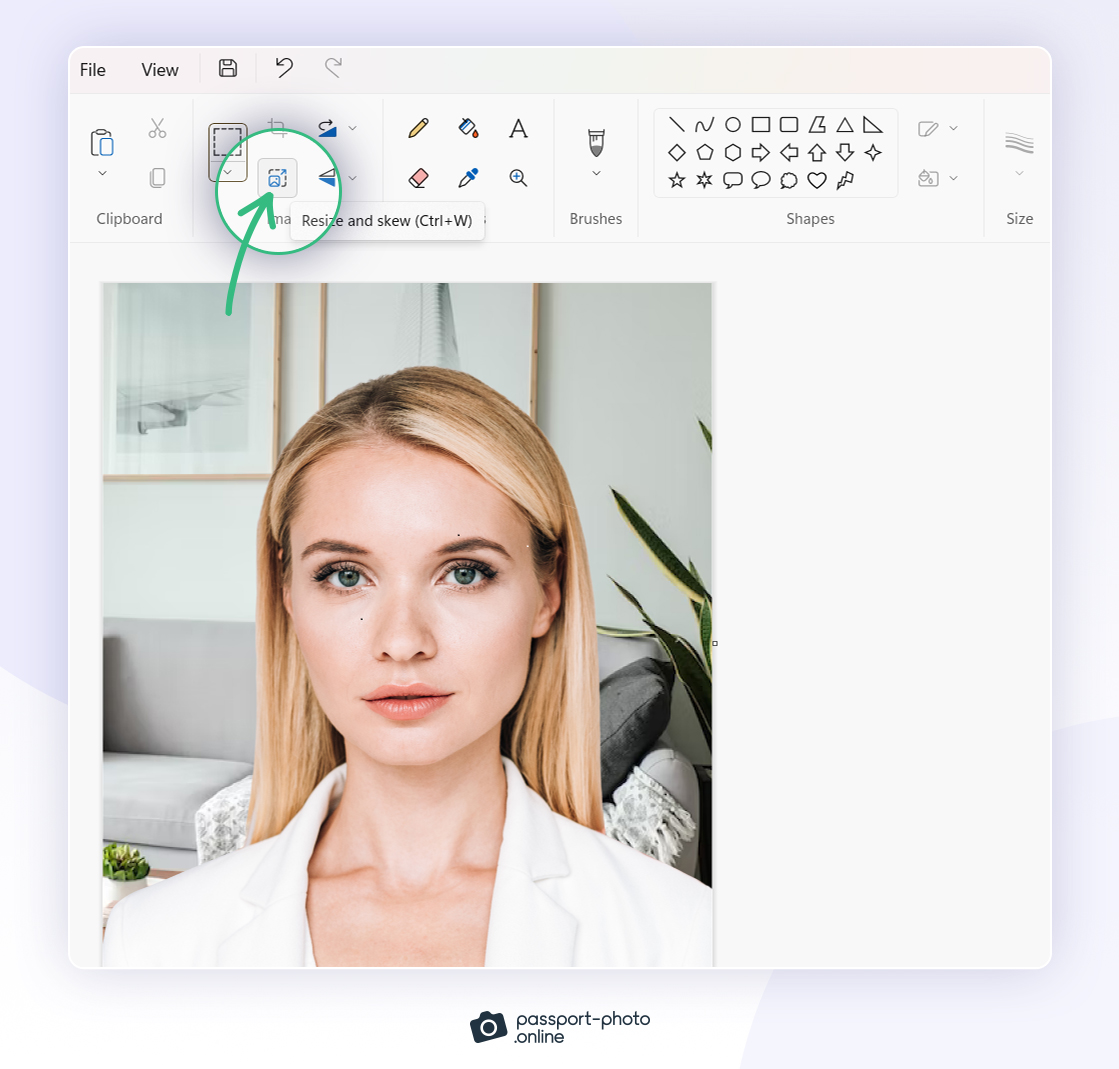
3. Once you get it cropped, click the “Resize and skew” icon (you can find it in the upper toolbar) or simply press Ctrl+W. Then, click on “Pixels.”
4. Now comes the annoying part. You may see that the height value is larger than the width value or vice versa. There’s no other way but to keep cropping till you get the right proportions (or as close to them as possible).

5. Now it’s the moment to make the aspect ratio bigger in order to fit the 2000 pixels. To do that, you need to click on “Maintain aspect ratio,” so both the height and width change accordingly, and you avoid ruining the image’s proportions.
In my case, the best I could get is a 2000×2037 px image, meaning I wasn’t able to get a picture in the exact dimensions the State Department asks for.
To sum up, resizing an image to passport size in Paint may not be the best method, as there’s no guarantee the passport office will accept your photograph. As demonstrated, this process can be a headache, and that’s why we don’t recommend it.
Resize an image to passport size with MS Word
Here’s how to crop a passport-size photo in Word:
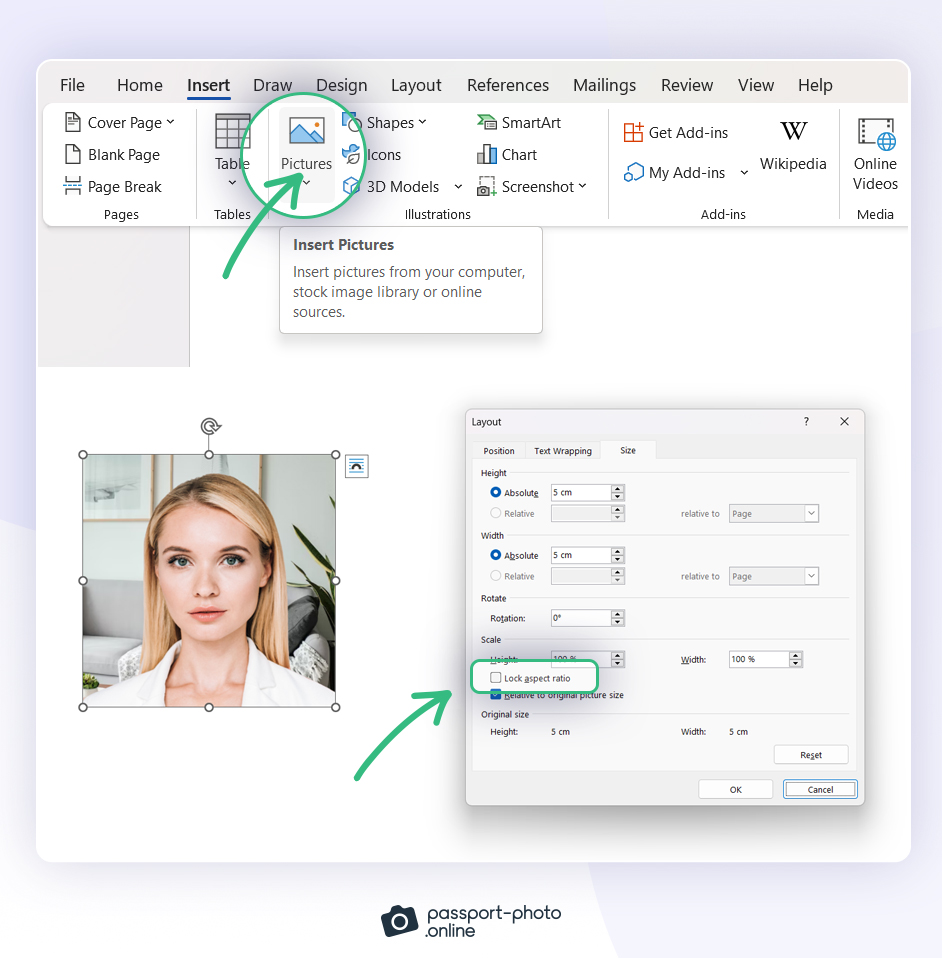
1. Go to the Microsoft Word toolbar and click the “Insert tab.” Click the “Pictures” button now (you’ll see a drawing of some blue mountains and the sun).
2. Choose the “This Device” option to upload the picture from your device, look for the file in your device, select it, and then click “Insert.”
3. Resize the uploaded image by dragging its corners. Now right-click on the image, select the “Picture Format” tab, and click the “Crop” button. You’ll need to change the dimensions to the correct passport photo size: height and width must be 2 inches (or 51 mm) each.
Here’s the tricky part—
4. The image aspect ratio is locked, so crop the picture further for the required measurements. Just change the height and go back to the picture to keep cutting until the width is 2 inches as well.
5. Right-click on the cropped picture and select the “Size and Position” option. Here you’ll just need to uncheck the “Lock aspect ratio” box, change the values to the required passport photo ratio, and click “OK” to save changes.
If you wish to get more image copies, simply copy and paste the photo and place them next to each other. This way, you get more than one picture on the same printout.
Done with passport photo cropping?
Read these articles to learn more about editing and printing passport photos:
- 10 Best Places to Print Passport Photos
- How to Print Passport Photos on 4×6 Paper
- Best Printer for Passport Photos
Six tips to crop a photo to passport size yourself
Here are several things to keep in mind before you start cropping your passport pictures.
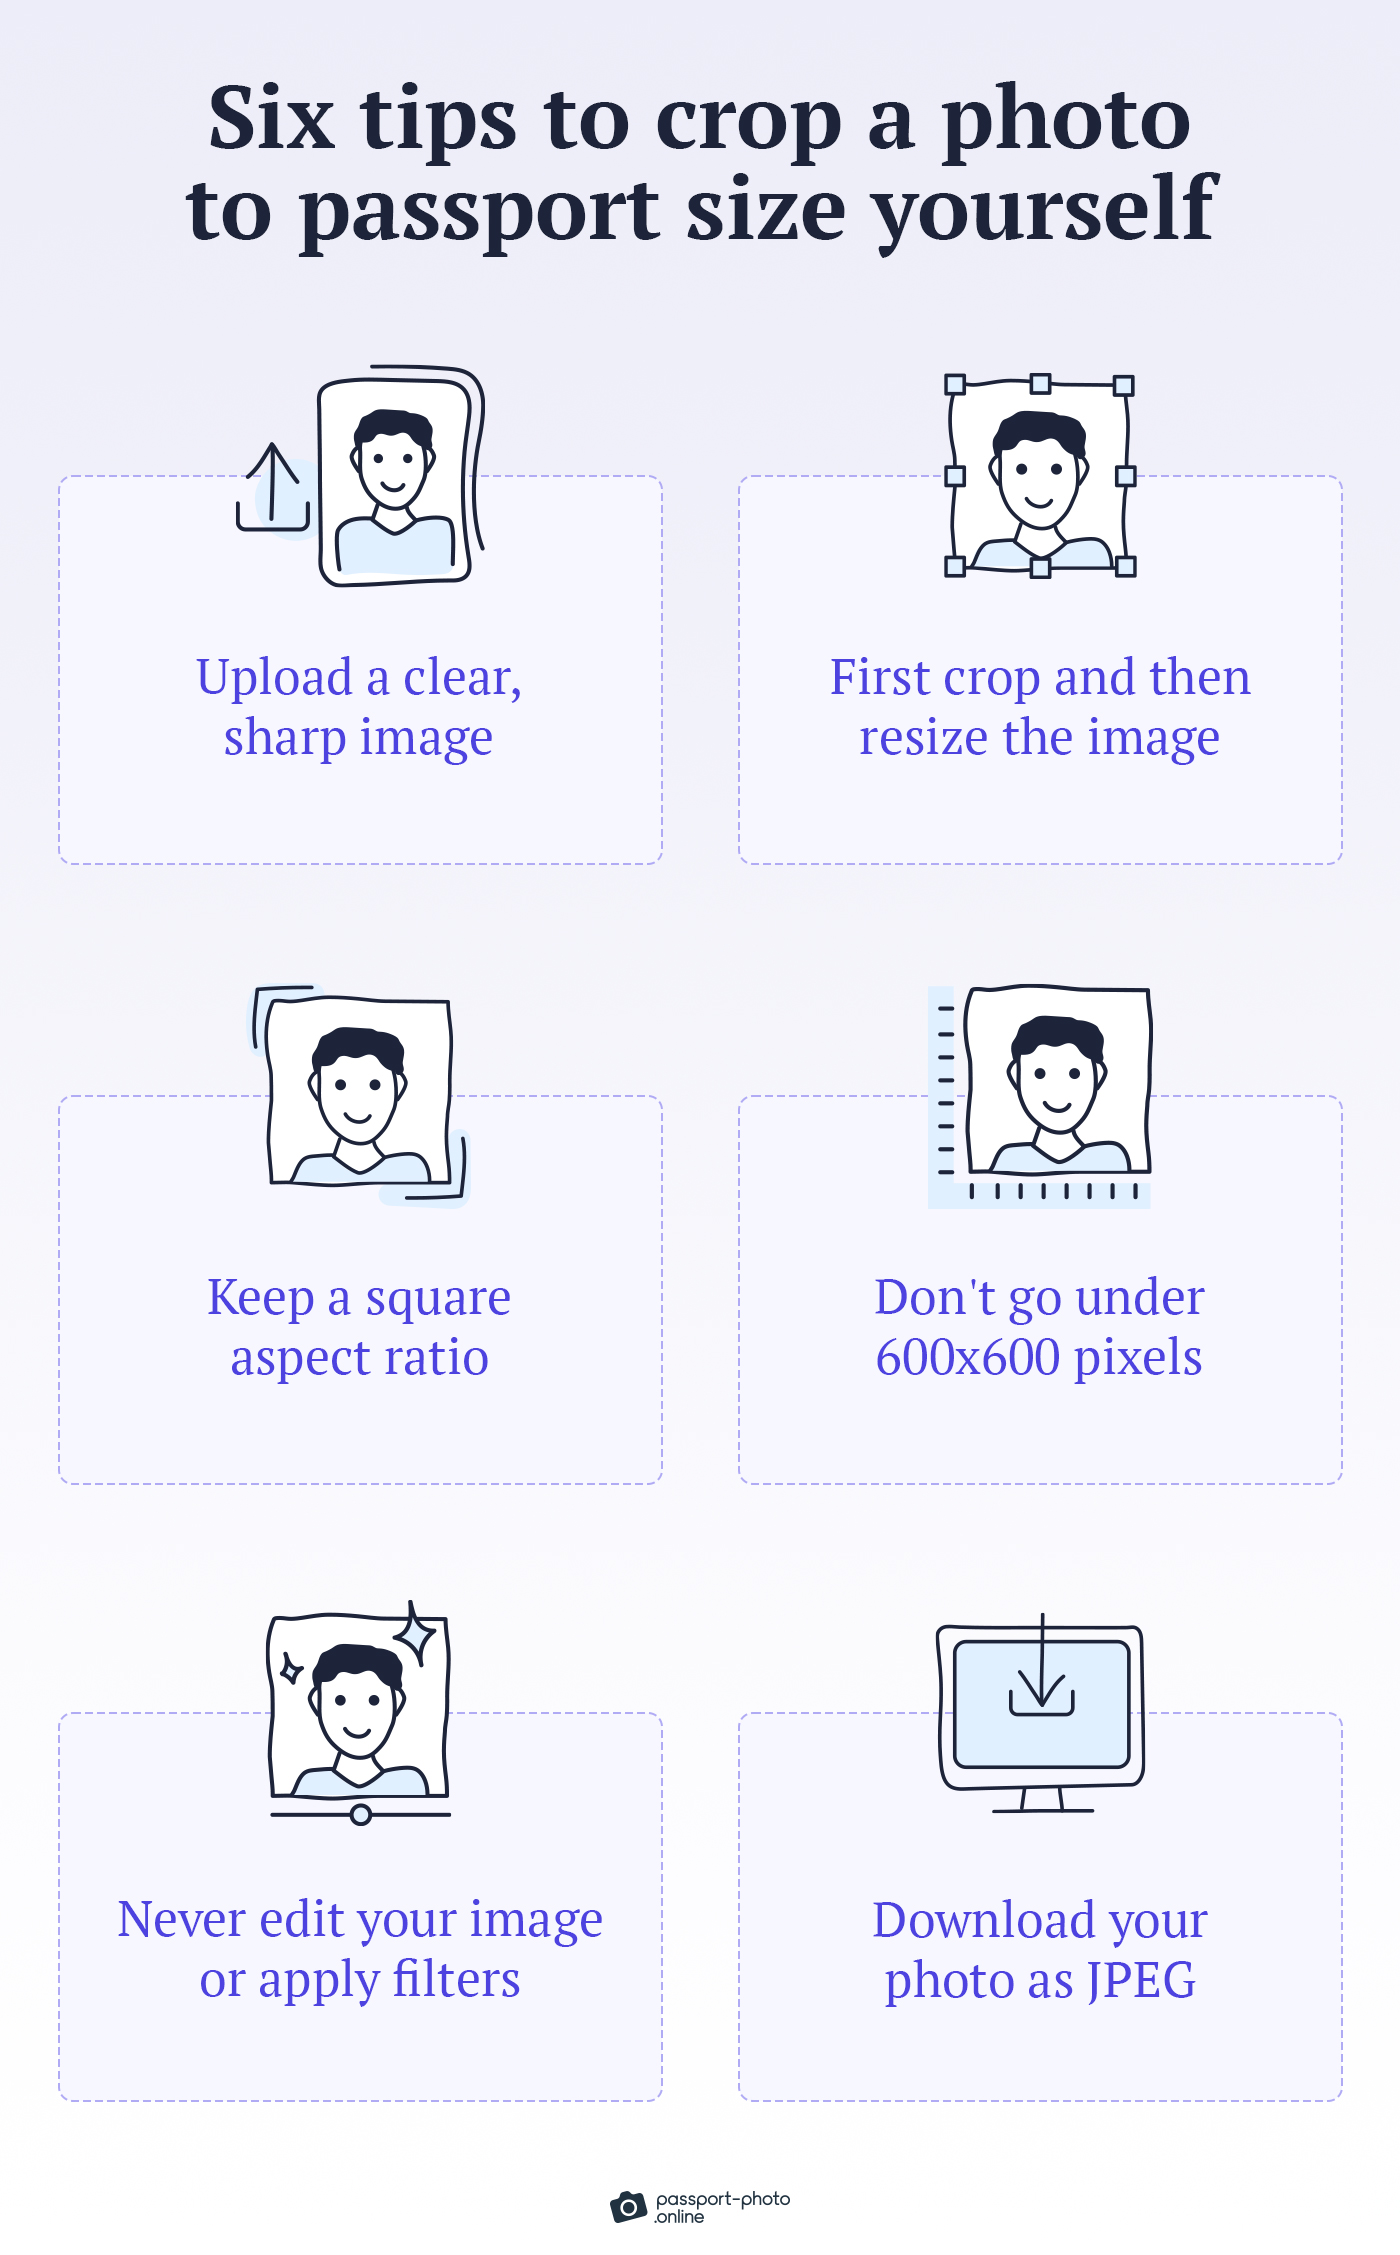
- Only upload a clear, sharp image with appropriate lighting and a white background, with the subject maintaining a neutral facial expression and open eyes.
- Crop the image before resizing it, so your head is between 25–35 mm from the bottom of the chin to the top of the head.
- Maintain a square aspect ratio.
- Apply the size of 600×600 pixels.
- Never edit the image—it must show your natural appearance. You cannot digitally alter your photo to remove red-eye or any other flaws.
- Download the photo in JPEG format after you resize it (PNG or PDF format is not accepted).
And most importantly—
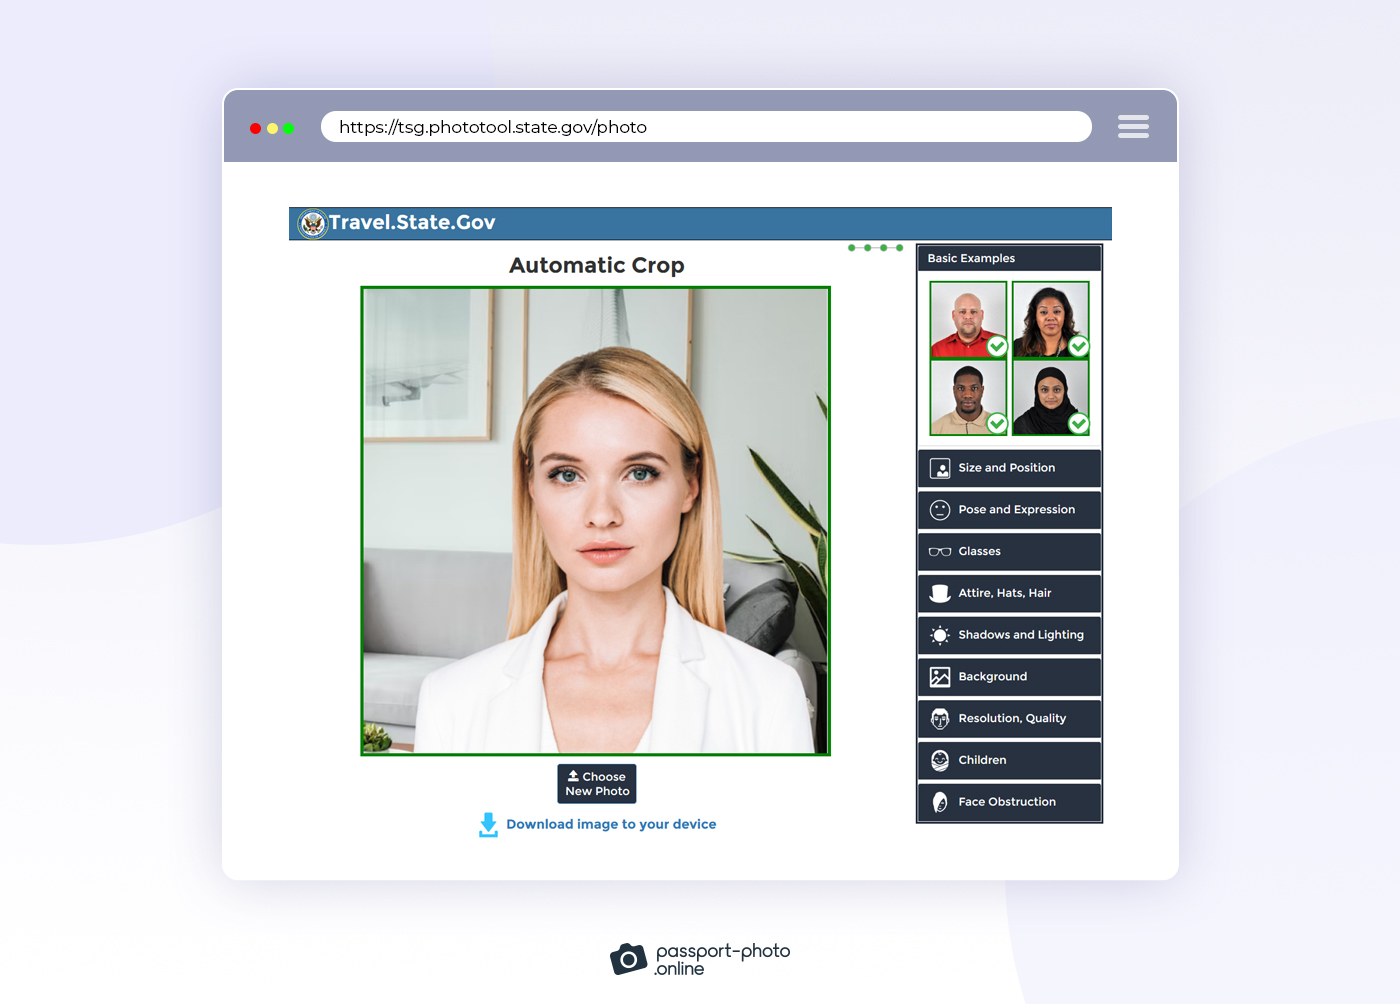
Visit the official gov site so the dedicated system can check if the resized photo is correct.
FAQs
What's the width and height of a passport photo?
How to convert a photo to passport size for free?
How to make a 2×2 picture online for free?
How to create a passport-size photo?
Wrap up
To resize a photo to passport size, you have two options:
- Use a professional resizing tool to get the photo size properly adjusted in only a few seconds
- Get Photoshop, Lightroom, Paint, or Word, and try to resize your passport photo manually
Here’s what to keep in mind while resizing passport photos:
- Crop your image to 2×2 inches (square passport-size photo ratio)
- Ensure the resolution is ≥600 pixels per inch
- Keep the file size equal to or less than 240 KB
- Save your image in JPEG file format
And if you don’t want to go through the hassle of doing this yourself, Passport Photo Online is here to help you—3 minutes and a smartphone is all you need!

Alejandro is a writer with 5+ years of experience. He graduated in English philology and holds an MA in Multilingual and Intercultural Communication. In his spare time, he improves recipes, seeking to delight his tastebuds.